Tag Archives: pirates

Reavers on the Seas of Fate – Season Three, Thirteenth Session

Thirteenth Session (8 page pdf) – “Dreams of Conquest” – The crew and Xiola hatch a plan to get control of the Celestial Lens.  They get the outcast colony on board and create a battle plan that doesn’t involve them all getting wiped out.

The PCs return to the rebel colony and, as usual, anytime all the PCs are gone I do some rolling to see what happened in the meantime – in this case, one death, one marriage, some loot, and a recruit. And a lead on finding the Black Bunyip!

The group does what they do best, which is gathering intel and synthesizing an attack plan out of it. They will wait till a day where the control doodad for the Flame of Guidance, aka the Flying Azlanti Death Ray Lens, is in the less secure hands of the cultist colony instead of the “near infinite CR” third island which is a blasted fiery hellscape. They convince the Fertile Families of the Sun Temple group and the rebel colonists to help to various degrees. All session is spent on the battle planning and prep – but they know the better they plan, the better it will go – next time!

Reavers on the Seas of Fate – Season Three, Twelfth Session

Twelfth Session (11 page pdf) – “Tower of the Vampire Queen” – Collecting their reward from a crazy evil vampire stripper takes a while. Then, they decide it’s time to clean up Lefty’s act at a most inopportune time.

OK, this is where the whole “don’t trust the vampire stripper” thing really started to make this drag a bit, but I rolled with it. In the module, it really was just a matter of going down into a room, messing with some trapped sarcophagi, and coming away with scads of loot. But they distrusted her so much that they wouldn’t go down there.  “Bring it to us!” they demanded. It eventually comes to blows, but the vampiress’ vampire tiger totally owns Serpent and so she manages to force a detente. The players are all talking depressed like “oh we lose we’re minions now” while she’s like “come get your treasure you crazy blood-sacks.” Finally they take it, including the spell-storing gem the Rain Tiger, and depart Rana Mor.

Then mistrust hits a second time. Lefty is on watch and tells Sindawe something’s coming.  I guess he thought it was a trick since Lefty’s still flame-slug-possessed, so he sleeper holds him and the group ends up fighting his flame slug. This wouldn’t have been so bad if Lefty hadn’t been telling the truth, because they’re all otherwise engaged when the gibbering flaming guys show up again (those possessed by Tears of Nuu’rugal sometimes mutate till they’re kinda flaming gibbering mouthers on legs over time). I had anticipated a tough fight where they finally defeat the guys they ran from a couple sessions ago, but since they were in disarray already from fighting Lefty and his flame-slug it was going poorly for them – Wogan spent an Infamy Point to collapse the ruins on them rather than fight it out.

And that’s the session – it was supposed to be “loot some treasure and then have a random encounter” but ended up taking the whole time!

Reavers on the Seas of Fate – Season Three, Eleventh Session

Eleventh Session (17 page pdf) – “Rana Mor” – Though they pretend to look down on vampire strippers, the crew still does what this one bids them. They penetrate to the heart of the temple and kill the ancient undead high priest. Now they shall claim their just reward.

Saeng Ki

Saeng Ki

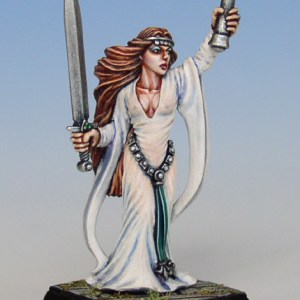
I’m afraid the art for Saeng Ki (this is from the actual adventure in Dungeon) backfired a little in this case.  Normally, “hot chick” can be somewhat inspiring to our all-guy group. But in this case, it was a little too over the top, and they immediately dubbed her “a vampire stripper” and refused to take her seriously on the grounds that both vampires and strippers are Chaotic Evil and that she’d betray them in ways few men have been betrayed by a woman.

So even though she’s offering them a pretty good deal, there’s endless back and forth bickering and negotiation and all for the first part of the session.

Finally they move off at her behest and wander the dungeon.  I put in some Azlanti chariot beetles; I went through all the Pathfinder stuff I had and pulled everything vaguely Azlanti to use on this whole trip.  Then there’s a lively fight in a room full of dart traps with undead monks in a silence zone.  It culminates with a long knock-down-drag-out with the main huecuva priest and his mummies; the PCs retreat initially and lead the mummies into some traps and then retreat more till Saeng Ki herself is helping them… Death or glory!

Reavers on the Seas of Fate – Season Three, Tenth Session

Tenth Session (12 page pdf) – “Graveyard of the Masters” – Below the Azlanti graveyard lies a hidden temple to Zura. The crew fights their way through undead clerics around the blood moat until they meet – a skull-faced stripper?

For this set of sessions I reskinned the Rich Baker adventure “Rana Mor” from Dungeon #86, originally set in an Indian jungle, as the Zuran temple. Zura, the Vampire Queen, was an Azlanti deity of vampires and blood and cannibalism and related themes. I wanted a place that was exotic and undeady, so I used this and just added a layer of blood and stuff over the existing symbology. The PCs were fascinated with the moat of blood; they took samples and wondered if they’d get powers from drinking it (“Yeah, probably just the power of hepatitis,” they decided in the end.)

They explore the place and fight a bunch of lively undead guardians, including cleric types that summon things, and it’s some heavy action for a while there in a running battle through the ruined halls.

Finally they meet the priestess Saeng Ki.

Saeng Ki

Reavers on the Seas of Fate – Season Three, Ninth Session

Ninth Session (9 page pdf) – “Torches In The Night” – The crew hangs out with a friendly member of the Sun Temple Colony, but their head priest decides to just burn them all out. Then it’s time to mess with Azlanti quicksilver grave/study aids.

Xiola Chelman

Xiola Chelman

Well, the PCs befriend Xiola Chelman, leader of the Fertile Families from the Sun Temple Colony, and she takes them back there. In usual fashion they don’t exactly make a good first impression…

The old man replies, “The believers and those without sin have nothing to fear. If you behave the night I will put in a good word with the priest.”
Sindawe asks him, “Are there any common rules that we should know about? Or things that we shouldn’t do?”
Serpent adds, “Are there any specific places we shouldn’t pee?” Everyone looks at Serpent with concern.
Wogan helpfully interjects, “Perhaps a complete list is unreasonable.”


This is one of those weird cases where the party had a good idea – asking about local rules – but then somehow rather than shutting up and listening for an answer they started explaining and elaborating and getting wrapped around their own axle. This led to a semi-in-character, semi-not discussion about the feasibility of asking about “places not to pee.”

Anyway, they get boarded up in a house and burned to death.  Or at least, that’s the plan, but they break out, taking the drunken Xiola and the flame-goo-possessed Lefty. Once the head priest summons a salamander they skedaddle for the forest. When they were trying to wake up the drunken Xiola and she muttered “Lemme along or I’m gonna kill ya,” that’s an Easter egg quote from a well-known tale of mine having to do with strippers and Jamaica.

They find out that Lefty has indeed been a plant for the cultists, but content themselves with winging him when he tries to flee and tying him up. Then they use a weird Azlanti graveyard/computer thing (actually from Shore to Sea but they never interacted with it there so I moved it here) and discovered that there’s an underground temple to the vampire goddess Zura underneath – and it turns out that Sindawe’s treasure map leads to it, as a Mwangi trail marker he finds that his father left indicates!

Reavers on the Seas of Fate – Season Three, Eighth Session

Eighth Session (14 page pdf) – “Cultists, Guns, and Money” – The line between friend and foe grows ever more slim and tenuous as the crew trades with a hermit and his killbot, fights some Sun Colonists and saves others, and are maybe betrayed by yet another…

OK, sorry, I’ve gotten like 2 years behind on blog posts for this campaign – we are still hacking away at it every other week like clockwork though! It’s going for epic length. Let’s see if I can get you all caught up.

When we last left our friendly pirate crew they had ventured out into the Arcadian Ocean to seek treasure in the spires of lost Azlant, as well as bring wanted pirate Morgan Baumann of the Black Bunyip back to Riddleport. They found the long-lost Sun Temple Colony (described in Lost Cities of Golarion, and I’m riffing off it) and have begun to explore and befriend (and/or slay) the natives. They discovered that the main group on the island has some kind of weird sun god and controls a Floating Azlanti Death Lens that does an ant-meets-magnifying-glass routine on anyone trying to come or go from the island. They have a buddy from the other group of ex-colonists, a one-handed lad named Lefty, who is guiding them as they explore the isle further.

First they get cornered by mutated gibbering dudes that set things on fire by touch. They escape them and meet a crazed hermit with a “killbot” who also pounds on them until they manage to engage him in conversation.  He reminds several people in the group of their crazy old Fox News-watching grandparents and so the discussion tends towards the evils of immigrants and the perils of fluoride in the water; they end up trading him stuff for cool bits of lost Azlanti tech.

Then they have a run-in with the Sun Temple Colonists, which is quite violent and during which they find out that they have some kind of fire-blobs in them and are immune to fire. They start to get suspicious of Lefty, which leads to my favorite exchange of the session:

Wogan turns on Lefty, slaps him and says, “Did you signal those guys from the tower? Are you working with the cultists?” Wogan slaps him again for good measure.

Lefty reddens and begins to tear up. He manages, “No…”

Wogan says, “I don’t believe you! What are you up to?” More slapping and yelling follows until Lefty cries out, “I’m changing! I can’t stay with my people much longer; I’ll have to join the cultists.”

Serpent says, “Puberty?”

Wogan asks, “Fish peoplism?”

Lefty replies, “I can’t tell you! My people consider it evil!”

Sindawe says, “Look, you can always join my crew. We don’t care what you’re changing into, because we can always use an extra set of hands.” Then considering the possibilities, he adds, “Are you turning into one of those touch burning mutants? Because that would be a lower rate of pay than ‘cultist’.”

Wogan whispers, “‘Bullet to the head’ sort of wages.” Serpent nods.

Then, based on their experience from Shore to Sea, they decide to talk to the Watchers, aka Azlanti Streetlamps, aka will-o-the-wisps.  That goes a little rocky, but they save a lady named Xiola from the colony!

Reavers on the Seas of Fate – Season Three, Seventh Session

Seventh Session (12 page pdf) – “The Sun Temple Colony” – The crew finds the lost Andoran colony built atop an Azlanti ruin.  They fall in with religious extremists as an Azlanti artifact nearly burns their ship to the waterline! Then they start poking around the island.

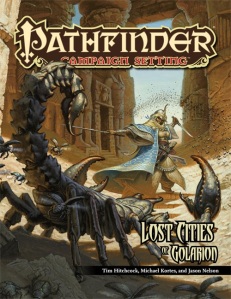
lost_citiesI liked doing the Sun Temple Colony after I did From Shore To Sea, because they were used to the WoW-like architecture of the Azlanti, and even knew to talk to the will-o-wisp streetlights in Aklo… But first they get lit up by the main attribute of the Sun Temple Colony, its big ol’ sun-focusing floating lens.

The Sun Temple Colony is from the Lost Cities of Golarion supplement. The intent here is that there’s parts of it about 10 CRs above the party’s level, so they have to keep it a bit on the down-low and play the locals against each other. They meet the “free” colonists and learn about the cult, the God-touched and breeder varieties. And they get a mascot, the impressionable 15-year-old Lefty.

Sindawe gets to exercise his captaining skills, which is generally “issue orders and then beat the nearest crewman unconscious since he’s clearly not moving fast enough.” They do get loot shares; this is probably the best place to give the pirate crewmen treasure because they are a thousand miles from anywhere they can spend it.

Then, it’s off to hexcrawl and explore the island!


Reavers on the Seas of Fate – Season Three, Sixth Session

Sixth Session (12 page pdf) – “Quest for Azlant” – The crew sees some hot action against the Mordant Spire Elves as they fight a skimmer to the bitter end. Then they investigate the weird dangers of Azlant, finally arriving at the Sun Temple Colony.

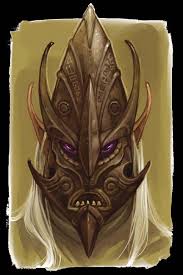
mordantspireThe fight against the Mordant Spire Elf skimmer is very different from their previous naval combats.  The elf ships are small and nimble, with small but very expert crews. Sindawe was shocked when they handily outsailed him and then the magic started – elementals, an unseen servant dropping the ToA’s anchor, fireballs, glitterdusts, fly, invisibility, and much much more!

And they maroon the female elf captain, eschewing torture, rape, etc., possibly as a result of last session’s heart-to-heart on the subject of pirate ethics. They do enjoy taking all the elves’ masks however! The Mordant Spire elves consider the Azlanti islands a “no go” area so patrol it and drive off outsiders. Didn’t work in this case, but it was a solid combat!

Then the crystal pillar they come across and decide not to enter is directly from a legend about real-life St. Brendan the Navigator I read in some book of exploration stories.

And finally they reach the place they end up staying a while – the Sun Temple Colony!

Reavers on the Seas of Fate – Season Three, Fifth Session

Fifth Session (15 page pdf) – “Island Tour” – The Teeth of Araska crawls through the sunken spires of lost Azlant looking for Morgann Baumann and the Black Bunyip.  And one crew member falls to MURDER! But a new and unusual  member joins the crew.

The Teeth of Araska ventures into the shattered remnants of lost Azlant in the middle of the Arcadian Ocean. Much of the action is ship-navigation, storms, and minor random encounters. Except for Tommy murdering Bojask over dinner.

Tommy’s player had to leave the game but we keep in touch.  Last time we talked he told me “Tommy’s totally against slavery, and he’s not going to put up with Bojask and his elven rape slave.” So at officer’s mess one night, he death attacks Bojask right in front of the other PCs, which they find appropriately shocking. Then there’s a lot of discussion and hashing over ethics and morals and feelings and practicalities…  This provides them an opportunity to actually discuss and introspect about the crew’s slaving and raping and whatnot, up till now it’s been happening as snap decisions without real party discussion.

And then, they find J.J. the seamunculus! He turns into a hilarious long-term NPC, an “anatomically correct” aquatic homunculus that a flamboyantly-dressed wizard made… He makes the PCs a mix of entertained and uncomfortable, just how it should be.

I like sessions like this where there’s some stuff going on but it serves mainly as a backdrop for PC/PC and PC/NPC interactions. The PCs are very invested in their ship and crew and are happy to go into great detail with them. Heck, it’s these roleplay sessions that turn into 15 page summaries like this one, as opposed to the combat ones where it’s 8 pages of “someone hit somebody.” Enjoy!

Best line:

Jaren the Jinx shouts out, “Buoy Ho!” The crew becomes so embroiled in making ribald jokes at this they nearly miss what he’s pointing at.

Reavers Sources – Third Season

Following on from my behind the scenes analysis of the various published adventures I’ve used in the commission of my Reavers campaign… (Also see Season One and Season Two).

Third Season

In this season I used some smaller sources from Dungeon magazines but a lot of it was homebrew. Not necessarily because I wanted to, but some items I was wanting to use fell through – like Voyages to the West, an Open Design patronage project that came in way late. But what I did use was…

  • I stole the town of Hollobrae from Firey Dragon Games’ 3e module “The Silver Summoning.”
    I don’t recommend the module, but as a repository for “I need a town for the PCs to raid” it worked fine and added character to the location in session 1. Daphne the unnamed one-line NPC became a recurring character.
  • “Tammeraut’s Fate,” from Dungeon #106, by Greg Vaughan
    This formed the first part of their Azlanti tour and occupied sessions 2-4. Sea zombies beset island monastery!
  • The Sun Temple Colony from Lost Cities of Golarion
    This is more of a capsule setting with adventure seeds, which I expanded upon to form a large section of the season, sessions 6-18 are set there. I also repurposed a couple things they didn’t come across in From Shore to Sea since it is also an Azlanti ruin.
  • Rana Mor,” from Dungeon #87, by Rich Baker
  • D1.5 “Revenge of the Kobold King,” 3.5e Paizo adventure
    Rana Mor formed the primary dungeon on the Sun Temple Island with a heavy reskin from “Indian” to “Azlanti” in feel; it filled sessions 10-12 and then again in sessions 16-17. I added a couple touches like the Sealstone and curse and giant beetles from Revenge of the Kobold King because those were “Azlanti.” I was really having to poll sources to get authentic Azlanti stuff; I also used gear/magic/etc. from the Open Design aquatic rules companion to From Shore to Sea, Sunken Empires.
  • Back to the Arm-Ripper/random dungeon combo from Season One!
    I got to reuse all the old content in sessions 22-25, but had to update it significantly since it was denuded of baddies last time and was much lower level last time…  So wrathspawn pirates as mentioned in Dungeons of Golarion were in residence!

The Dungeon sources from this season and last were all good, I picked them specifically because they were some of the stars from the magazine’s run.  I’d run Tammeraut’s Fate before but the rest were new to me. The baddie from Rana Mor got dubbed a “vampire stripper” based on her cheesecakey art. She was dangerous as a real stripper though and was a big foil/villain for the latter half of the season. A lot of the actual Sun Temple threat was sorta faceless so I wanted to have another baddie who was more personally memorable. I did a lot more picking locations/seeds out of books instead of whole cloth adventures this season.

And that’s how you run a multi-year campaign that meets very regularly for long play sessions while still having a demanding job and kid and life otherwise! Take preexisting building blocks, add the mortar to join them together, then put a nice veneer over the top. The time you save on making the blocks means you can shine on the additions.

I’ve compiled all these into a new page in the Reavers section, I’ll add to it as we go on!

Reavers on the Seas of Fate – Season Three, Fourth Session

Fourth Session (10 page pdf) – “Zombie Proof” – as if zombie barbarians and zombie Red Mantis assassins aren’t enough, the crew ventures beneath the waves to the wreck of the Tammeraut, following their own fates.

In this session, we resume in mid-fight as the zombies threaten to overwhelm the hermitage on Firewatch Island. When they all have to fall back and barricade themselves into the scriptorium to avoid the undead hordes comes my favorite dialogue of the session:

Daphne says, “It’s days like this I’m glad I was kidnapped by pirates.”

I turned the spellcasting into a mini-game to race against time, and when Wogan and Janore finally got the spell cast they doubled down on the existing storm to waterspouts that cleansed the island of zombies!

The generic ghost that’s the end of Tammeraut’s Fate is instead part of the legacy of the shadow phantom-haunted members of the small band that got Cypher-glyphs exploded into them at the climax of Season One, Madness in Riddleport. The ongoing theme of the corruption of that kind of magic continues!  And then, they depart with a spell that can find them the Black Bunyip and Morgan Baumann!

Reavers Sources – Second Season

Continuing on from the First Season, more on the sources I have used in the Reavers campaign!

Second Season

In the second season, I moved past the “toss in all the L1-3 adventures I have laying around” approach as the established plot and character and setting took root.  Season 2 is basically three Paizo adventures – Carrion Hill (augmented by a Dungeon adventure), Second Darkness Chapter 2, and From Shore to Sea.

  • Carrion Hill, a Pathfinder adventure
  • “The Stink” from Dungeon Magazine #105, by Richard Pett
    I combined these to make a post-Riddleport tsunami “Katrina horror” scenario that spanned all of sessions 2-5 (a bit more than I’d anticipated!).
  • Children of the Void, the second chapter in Paizo’s 3.5e Second Darkness Adventure Path
    This filled up sessions 6-10, plus the optional “Teeth of Araska” adventure from this book occupied session 11! I expanded on it but not with other material really, just my own elaboration.
  • “Shatterhull Island” from Stormwrack again
    I used another mini-adventure from Stormwrack for session 13 after a couple sessions of custom content.
  • From Shore To Sea“, a Paizo/Open Design adventure
    Before this I spent sessions 14-19 purely riffing on preexisting NPCs and stuff spinning out into whole adventures. But then From Shore To Sea became one big ol’ part of this season. Sessions 20-24, all the way to the end of the season, are made of nothing but this puppy!

Now let me be clear – you don’t want to run Carrion Hill or From Shore To Sea as written.  If you go through the blog posts for those sessions you’ll get a lot more details on what I changed, but the Carrion Hill plot and encounters are questionable and in From Shore To Sea there’s ridiculous DCs and other rules wonkiness that would cause some real problems. But they both have loads of great atmosphere and ideas in them, and a GM is the nice slickery lubrication between an adventure as written and his game as run. So this had less mashing up of multiple sources and more elaboration and tailoring of single sources.

Also, the more we’re on the high seas the more I use general wavecrawling, random weather and random encounters to populate entire sessions.  Each ship-to-ship battle is a complex set-piece of its own! Recurring baddies like the Fishwife sprung entirely from that.